ASP.NET Core + Vite
目次
-
- 3.1. Vite のインストール
- 3.2. TypeScript のインストール
- 3.3. vite.config.ts の作成
- 3.4. 出力フォルダの指定
- 3.5. 出力ファイル名の指定
- 3.6. ts ファイルのフォルダを指定
- 3.7. 複数ファイルの出力に対応する
- 3.8. 全ての index.ts を対象とする
-
- 4.1. npm スクリプトの追加
- 4.2. 起動
- 4.3. 動作確認
- 4.4. root の設定
- 4.5. Vite 開発サーバーを自動的に起動
-
- 6.1. package.json
- 6.2. azure-pipelines.yml
はじめに
ASP.NET Core(Visual Studio)で TypeScript をコンパイルしたい場合、いくつかの選択肢があります。
| 方法 | 概要・備考 |
|---|---|
| TypeScript SDK | Visual Studio に付属していた。現在は非推奨。1 |
| Microsoft.TypeScript.MSBuild | Microsoft 公式の NuGet パッケージ |
| tsc(Node.js) | tsc コマンドで TypeScript をコンパイル |
| Webpack + tsc | バンドルが基本。HMR は設定で可能。 |
| Vite + tsc | ESM で HMR するので開発時に高速差し替えできる。 |
Visual Studio の場合、Microsoft.TypeScript.MSBuild が標準の選択肢となります。Visual Studio は tsconfig.json の compileOnSave オプションに対応しているため、ts ファイル保存時に自動コンパイルしてくれます。単純に ts ファイルを js ファイルに1:1で変換する用途であればシンプルでよいです。ただし、「他のファイルを import したい」とか「ts ファイルが長くなってきたので分割したい」とか、いろいろやりたくなった時に様々な制限があって難しいです(ただし、できなくはない 2)。
また、開発中は ts ファイルを頻繁に更新するので、HMR(Hot Module Replacement)を使いたいと思うようになりました。仕組み的に ESM(ECMAScript Modules)でモジュールを差し替える Vite のほうが Webpack より速そうなので Vite を使った構成を採用することにしました。
以下は ASP.NET Core プロジェクトで Vite を使用する手順となります。
前提条件
- ASP.NET Core プロジェクトが作成済みであること
- Node.js がインストール済みであること
- Visual Studio 2022 以降
Vite ビルド環境を構築
プロジェクトフォルダで作業します。
1Vite のインストール
npm install vite --save-dev
2TypeScript のインストール
npm install typescript --save-dev
package.json ファイルは以下のようになります。
{
  "devDependencies": {
    "typescript": "^5.9.3",
    "vite": "^7.1.7"
  }
}
3vite.config.ts の作成
npx vite build でビルドしてみましょう。
> npx vite build
>>
vite v7.1.7 building for production...
✓ 0 modules transformed.
✗ Build failed in 9ms
error during build:
Could not resolve entry module "index.html".
index.html が無い、というエラーになりました。
Vite はデフォルトでプロジェクトルート直下の index.html をエントリーポイントにします。
設定ファイル vite.config.ts を作成して、エントリーポイントのファイルを指定します。vite.config.ts はプロジェクトルート直下に作成します。
// vite.config.ts
import { defineConfig } from 'vite'

export default defineConfig({
    build: {
        rollupOptions: {
            input: {
                hoge: 'index.ts',
            }
        }
    }
})
プロジェクト直下に index.ts ファイルを作成して、再度 npx vite build してみます。
// index.ts
console.log('hoge');
> npx vite build
>>
vite v7.1.7 building for production...
✓ 1 modules transformed.
dist/assets/hoge-BBL_kPP-.js  0.02 kB │ gzip: 0.04 kB
✓ built in 40ms
正常終了しました。コンパイルされた JavaScript は dist/assets フォルダに出力されています。
// dist\assets\hoge-BBL_kPP-.js
console.log("hoge");
ファイル名の -BBL_kPP- の箇所は Vite が生成したハッシュ値になります。出力ファイル名を明示しない場合、このようなハッシュ値がデフォルトで付加されます。
次に出力場所を指定しましょう。
4出力フォルダの指定
ASP.NET Core アプリですので wwwroot フォルダに出力したいですね。
以下の設定で wwwroot/js フォルダに出力できます。
// vite.config.ts
import { defineConfig } from 'vite'

export default defineConfig({
    build: {
        outDir: 'wwwroot/js',   // 出力先フォルダ
        emptyOutDir: false,     // フォルダを空にしない
        rollupOptions: {
            input: {
                hoge: 'index.ts',
            }
        }
    }
})
emptyOutDir は出力先フォルダを空にしてからコンパイルする設定です。デフォルト値は true ですので、他の JavaScript を併用する場合を考慮して、ここでは false を指定しました。
> npx vite build
>>
vite v7.1.7 building for production...
✓ 1 modules transformed.
wwwroot/js/assets/hoge-BBL_kPP-.js  0.02 kB │ gzip: 0.04 kB
✓ built in 35ms
指定した出力先フォルダに出力されました。
次は出力ファイル名を変更します。
5出力ファイル名の指定
ファイル名にハッシュ値を付与するのは、コードが変更された時に最新の js ファイルをブラウザに読み込ませるための手段(cache busting)です。
ただし、ASP.NET Core の場合、asp-append-version で cache busting できますので、ファイル名にハッシュ値を含める必要はありません。固定のファイル名にしましょう。
// vite.config.ts
import { defineConfig } from 'vite'

export default defineConfig({
    build: {
        outDir: 'wwwroot/js',   // 出力先フォルダ
        emptyOutDir: false,     // フォルダを空にしない
        rollupOptions: {
            input: {
                hoge: 'index.ts',
            },
            output: {
                entryFileNames: `[name].js` // 出力ファイル名
            }
        }
    }
})
> npx vite build
>>
vite v7.1.7 building for production...
✓ 1 modules transformed.
wwwroot/js/hoge.js  0.02 kB │ gzip: 0.04 kB
✓ built in 36ms
固定のファイル名で出力されるようになりました。
cshtml からは以下のように参照できます。
// index.cshtml
<script src="~/js/hoge.js" asp-append-version="true"></script>
6ts ファイルのフォルダを指定
プロジェクト直下に TypeScript ファイルを置いていましたが、ClientApp フォルダを作って、そこに配置するようにします。
// vite.config.ts
import { defineConfig } from 'vite'

export default defineConfig({
    build: {
        outDir: 'wwwroot/js',   // 出力先フォルダ
        emptyOutDir: false,     // フォルダを空にしない
        rollupOptions: {
            input: {
                hoge: 'ClientApp/index.ts',
            },
            output: {
                entryFileNames: `[name].js` // 出力ファイル名
            }
        }
    }
})
7複数ファイルの出力に対応する
複数のエントリポイントから js ファイルを出力したい場合は以下のように書きます。
// vite.config.ts
import { defineConfig } from 'vite'

export default defineConfig({
    build: {
        outDir: 'wwwroot/js',   // 出力先フォルダ
        emptyOutDir: false,     // フォルダを空にしない
        rollupOptions: {
            input: {
                hoge: 'ClientApp/index.ts',
                fuga: 'ClientApp/index2.ts',
            },
            output: {
                entryFileNames: `[name].js` // 出力ファイル名
            }
        }
    }
})
> npx vite build
>>
vite v7.1.7 building for production...
✓ 2 modules transformed.
wwwroot/js/hoge.js  0.02 kB │ gzip: 0.04 kB
wwwroot/js/fuga.js  0.02 kB │ gzip: 0.04 kB
✓ built in 42ms
input に指定した hoge、fuga が出力ファイルの [name] に適用されます。
これでも必要十分ではありますが、エントリポイントを追加するたびに vite.config.ts を変更するのは避けたいですね。もう少し汎用的なルールにしてみます。
8全ての index.ts を対象とする
以下のルールとします。
- ClientApp フォルダ内の全ての index.ts をエントリポイントとする
- フォルダ構成と同じ階層で js ファイルを出力
例)
ClientApp/pages/
 ├─ hoge/
 │   └─ index.ts
 └─ fuga/
     └─ piyo/
         └─ index.ts
wwwroot/js/pages/
 ├─ hoge.js
 └─ fuga/piyo.js
Razor Pages のフォルダ構成に合わせられるようにするのが目的となります。
vite.config.ts は以下のようになります。
// vite.config.ts
import { defineConfig } from 'vite';
import { relative, dirname, resolve } from 'path';
import fs from 'fs';

function collectEntries(rootDir: string): Record<string, string> {
    const entries: Record<string, string> = {};

    function walk(dir: string) {
        for (const item of fs.readdirSync(dir, { withFileTypes: true })) {
            const fullPath = resolve(dir, item.name);
            if (item.isDirectory()) {
                walk(fullPath);
            } else if (item.isFile() && item.name === 'index.ts') {
                const outputName = relative(rootDir, dirname(fullPath)).replace(/\\/g, '/');
                entries[outputName] = fullPath;
            }
        }
    }

    walk(rootDir);
    return entries;
}

export default defineConfig({
    build: {
        outDir: 'wwwroot/js',
        emptyOutDir: false,
        rollupOptions: {
            input: collectEntries('ClientApp'),
            output: {
                entryFileNames: '[name].js'
            }
        }
    }
});
rollupOptions.input の型は Record<string, string> です。
- キー: 出力される JS ファイル名(相対パス)➜
outputの[name]になる - 値: 対応する TypeScript ファイルの絶対パス
collectEntries で ClientApp フォルダを再帰的に走査し、index.ts を見つけたらフォルダ名を js ファイル名に設定する、という流れです。これで ClientApp フォルダ内に index.ts を作成すれば、フォルダ構成に従ったファイル名 js ファイルが作成されるようになります。
Vite 開発サーバーの実行
ここまではビルドツールとしての Vite を使用する方法を見てきましたが、次は開発サーバーとしての使用方法を確認します。ASP.NET Core + Visual Studio の場合、主に IIS Express または Kestrel が開発用 Web サーバーになりますが、これはそのまま残しつつ、Vite を js / ts ファイルの配信用サーバーとして使用することになります。
1npm スクリプトの追加
package.json に npm スクリプトを追加します。
{
  "scripts": {
    "dev": "vite"
  },
  "devDependencies": {
    "typescript": "^5.9.3",
    "vite": "^7.1.7"
  }
}
2起動
実行してみます。
npm run dev
以下のように表示されれば Vite 開発サーバーの起動完了です。
  VITE v7.1.7  ready in 196 ms

  ➜  Local:   http://localhost:5173/
  ➜  Network: use --host to expose
  ➜  press h + enter to show help
Vite サーバーはポート番号 5173 を使用します。
3動作確認
動作確認してみましょう。
以下の TypeScript を作成します。
// ClientApp/pages/hoge/index.ts
console.log('hoge');
cshtml は以下のように書きます。
<script type="module" src="http://localhost:5173/@@vite/client"></script>
<script type="module" src="http://localhost:5173/ClientApp/pages/hoge/index.ts"></script>
プロジェクトを実行してページを表示した時にブラウザのコンソールに hoge と表示されればOKです。
次に、TypeScript のコードを変更してみます。
// ClientApp/pages/hoge/index.ts
console.log('hoge');
alert('fuga');
ページをリロードしなくてもアラートメッセージ fuga が表示されました。これが HMR(Hot Module Replacement)です。
4root の設定
cshtml ファイルでの ts ファイルの参照先は以下のように記述しました。
<script type="module" src="http://localhost:5173/@@vite/client"></script>
<script type="module" src="http://localhost:5173/ClientApp/pages/hoge/index.ts"></script>
特に指定しない場合、Vite はプロジェクトのルートフォルダを基準とした相対パスを使用します。
root で基準となるフォルダを指定できます。
// vite.config.ts
・・・
export default defineConfig({
    root: 'ClientApp',
    build: {
        outDir: '../wwwroot/js',
        emptyOutDir: false,
        rollupOptions: {
            input: collectEntries('ClientApp'),
            output: {
                entryFileNames: '[name].js'
            }
        }
    }
});
このように少しだけコンパクトに書けます。
<script type="module" src="http://localhost:5173/@@vite/client"></script>
<script type="module" src="http://localhost:5173/pages/hoge/index.ts"></script>
なお、@vite/client は HMR を実現するためのクライアントモジュールです。(@@ と @ を2つ書いているのは、Razor では @ が特殊文字なのでエスケープのため)
5Vite 開発サーバーを自動的に起動
npm run dev で Vite 開発サーバーを起動しますが、毎回コマンドを入力して起動するのは面倒です。Web
アプリの起動時に自動的に Vite 開発サーバーを起動するようにします。まず起動中の Vite 開発サーバーを Ctrl + C で終了します。
Program.cs に以下のコードを追加します。
// Program.cs
var app = builder.Build();

// Vite 開発サーバーを起動(開発環境のみ)
if (app.Environment.IsDevelopment())
{
    // 5173 ポートの使用状況を確認
    var listeners = IPGlobalProperties.GetIPGlobalProperties().GetActiveTcpListeners();
    var is5173PortInUse = listeners.Any(ep => ep.Port == 5173);

    // 5173 ポートが未使用であれば Vite サーバーを起動
    if (!is5173PortInUse)
    {
        var viteDevServer = new ProcessStartInfo
        {
            FileName = @"C:\Program Files\nodejs\npm.cmd",
            Arguments = "run dev",
            WorkingDirectory = Directory.GetCurrentDirectory(),
            UseShellExecute = true,
        };
        var viteProcess = Process.Start(viteDevServer);

        // 終了時に Vite を kill
        app.Lifetime.ApplicationStopping.Register(() =>
        {
            if (viteProcess != null && !viteProcess.HasExited)
            {
                viteProcess.Kill(true);
            }
        });
    }
}
Web アプリを実行してみましょう。
コマンドプロンプトのウィンドウで Vite 開発サーバーが起動しました(図1)。
図1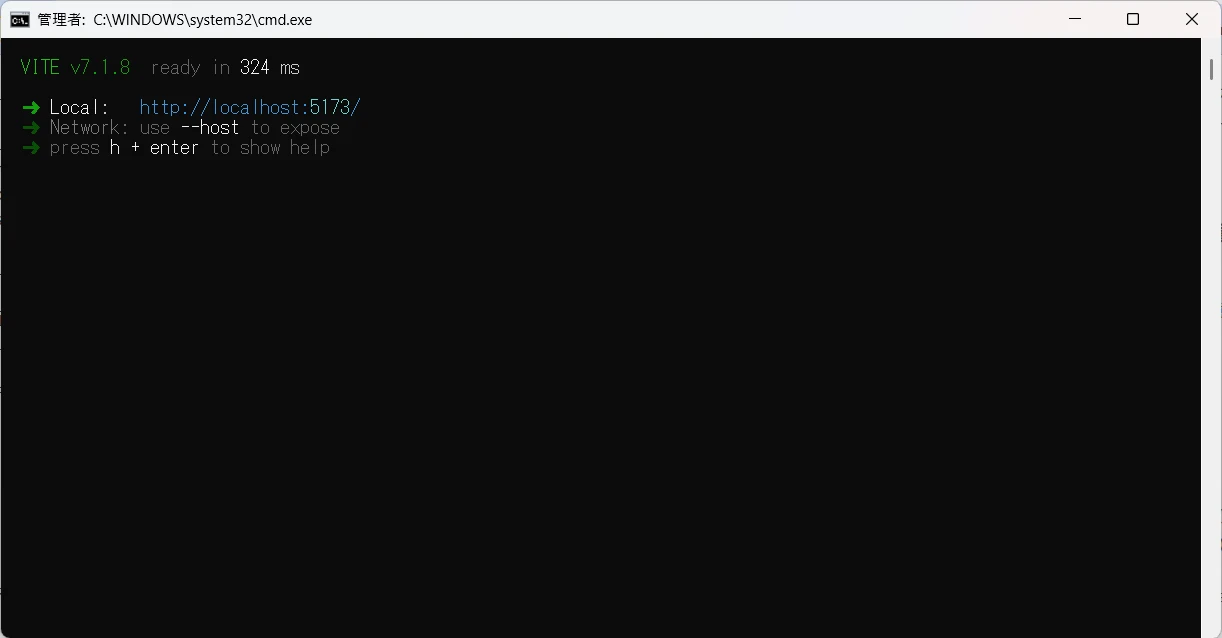
cshtml でビルドしたファイルを参照する
開発環境では ts ファイルを参照しますが、運用環境ではビルド&バンドルした js ファイルを参照することになります。
cshtml ファイルではどのように書けばよいでしょうか。
@inject IWebHostEnvironment Env
@if (Env.IsDevelopment())
{
    // 開発環境: Vite 開発サーバー経由で ts ファイルを参照
	<script type="module" src="http://localhost:5173/@@vite/client"></script>
    <script type="module" src="http://localhost:5173/pages/hoge/index.ts"></script>
}
else
{
    // 運用環境: ビルド済みの js ファイルを参照
    <script type="module" src="~/js/pages/hoge.js" asp-append-version="true"></script>
}
このように IsDevelopment 拡張メソッドで分岐します。
全ての cshtml ファイルにこのコードを書くのは嫌なのでタグヘルパーを作成します。
using Microsoft.AspNetCore.Hosting;
using Microsoft.AspNetCore.Mvc.Rendering;
using Microsoft.AspNetCore.Mvc.ViewFeatures;
using Microsoft.AspNetCore.Razor.TagHelpers;
using Microsoft.Extensions.Hosting;

namespace korochin.Core.Web.TagHelpers;

[HtmlTargetElement("vite-script", Attributes = "entry")]
public class ViteScriptTagHelper(IWebHostEnvironment env, IFileVersionProvider fileVersionProvider) : TagHelper
{
    [ViewContext]
    [HtmlAttributeNotBound]
    public required ViewContext ViewContext { get; set; }

    [HtmlAttributeName("entry")]
    public string Entry { get; set; } = "";

    public override void Process(TagHelperContext context, TagHelperOutput output)
    {
        output.TagName = null;

        if (env.IsDevelopment())
        {
            // 開発環境: Vite 開発サーバー経由で ts ファイルを参照
            output.Content.SetHtmlContent($@"
<script type=""module"" src=""http://localhost:5173/@vite/client""></script>
<script type=""module"" src=""http://localhost:5173/{Entry}/index.ts""></script>");
        }
        else
        {
            // 運用環境: ビルド済みの js ファイルを参照
            var jsPath = $"/js/{Entry}.js";
            var versionedPath = fileVersionProvider.AddFileVersionToPath(ViewContext.HttpContext.Request.PathBase, jsPath);
            output.Content.SetHtmlContent($@"<script src=""{versionedPath}""></script>");
        }
    }
}
_ViewImports.cshtml に追記してタグヘルパーを登録します。
//_ViewImports.cshtml
@using WebApplication1
@namespace WebApplication1.Pages
@addTagHelper *, Microsoft.AspNetCore.Mvc.TagHelpers
@addTagHelper *, WebApplication1
cshtml ファイルは以下のように書けます。これでコンパクトにできました。
<vite-script entry="pages/hoge" />
CI/CD への統合
Vite のビルドを CI/CD プロセスに組み込む方法です。
ここでは Azure Pipeline を使用したデプロイ に Vite のビルドプロセスを追加する手順をご紹介します。
1package.json
npm run build で vite build を実行できるように package.json に npm スクリプトを追加します。
{
  "scripts": {
    "dev": "vite",
    "build": "vite build"
  },
  "devDependencies": {
    "typescript": "^5.9.3",
    "vite": "^7.1.7"
  }
}
2azure-pipelines.yml
azure-pipelines.yml に以下の処理を追加します。
- Node.js のインストール
- 依存パッケージをインストール
npm run buildの実行
Vite の設定は Web アプリケーションのプロジェクトフォルダを基準にしていますので、作業ディレクトリ workingDirectory を Web アプリケーションのプロジェクトフォルダに設定する必要があります。以下の例は Web アプリケーションのフォルダ名が「korochin.Hoge」の場合となります。
package.json
trigger:
- main

pool:
  vmImage: ubuntu-latest

steps:
# Node.js のインストール
- task: NodeTool@0
  inputs:
    versionSpec: '22.x'
  displayName: 'Install Node.js'

# 依存パッケージをインストール
- script: |
    npm ci
  displayName: 'Install dependencies'
  workingDirectory: korochin.Hoge

# npm run build の実行
- script: |
    npm run build
  displayName: 'npm run build'
  workingDirectory: korochin.Hoge

- task: DotNetCoreCLI@2
  inputs:
    command: 'publish'
    publishWebProjects: true
    arguments: '--configuration Release'

- task: AzureWebApp@1
  inputs:
    azureSubscription: 'Service Connection'
    appType: 'webAppLinux'
    appName: 'korochin-hoge'
    package: '$(System.DefaultWorkingDirectory)/**/*.zip'
これでリポジトリへのプッシュ時に自動的に ts ファイルのコンパイルが行われるようになります。
脚注
-
Visual Studio の JavaScript と TypeScript
TypeScript SDK は、Visual Studio 2022 では非推奨になりました。 NUGet パッケージを使用するには、SDK に依存する既存のプロジェクトをアップグレードする必要があります。
-
たとえば Bundler & Minifier を使えば、コンパイルされた複数の
jsファイルを任意の単位でバンドルできます。↩