Azure Pipelines Automated Deployment (Git + ASP.NET Core)
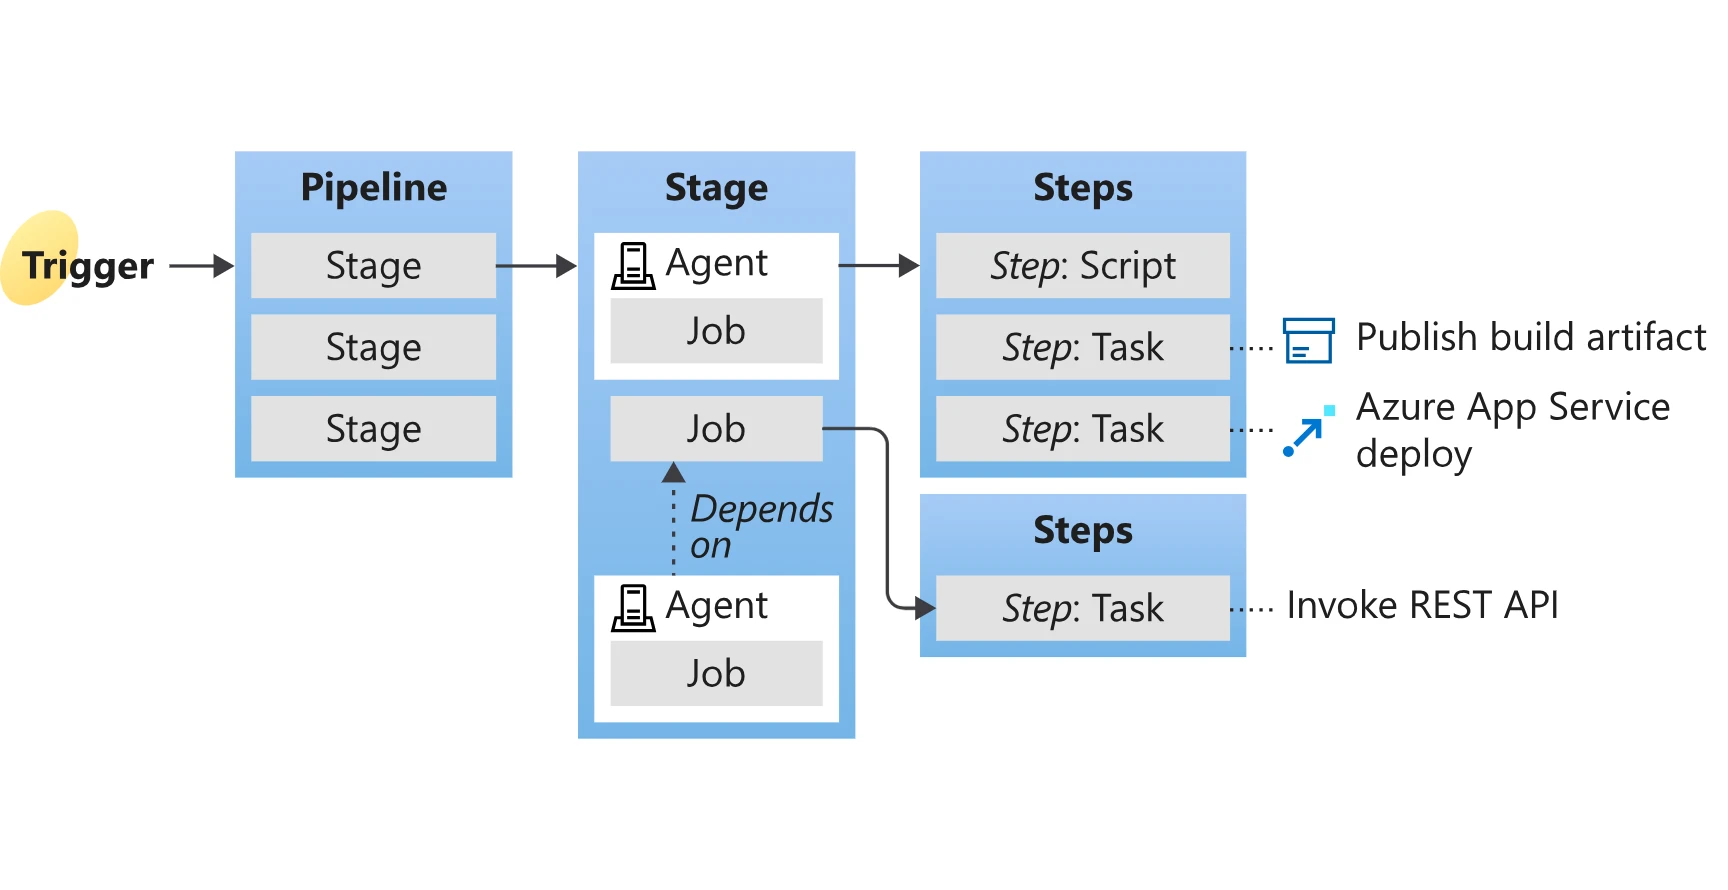
Table of Contents
-
- 4.1. Creating a Service Connection
- 4.2. Creating an Azure Pipeline
- 4.3. Contents of the YAML File
- 4.3.1. trigger section
- 4.3.2. pool section
- 4.3.3. variables section
- 4.3.4. steps section
- 4.4. Adding a Publish Task
- 4.5. Adding a Deploy Task
- 4.6. Executing the Deployment
Introduction
Azure Pipelines is a service provided by Azure DevOps to achieve CI/CD. While Azure Pipelines offers a wide range of capabilities, this memo focuses on automatically deploying source code from pushing to a repository (Git) to the execution environment.
- Automated deployment flow
flowchart LR
    A[Developer] --> |Push| B("Repository (Git)")
    B -.-> C(Azure Pipelines)
    C --> |Deploy| D(Execution Environment)
Prerequisites
- The deployment target is Azure App Service (Web App).
- The web app is a Razor Pages application using .NET 8.
- An Azure DevOps project's Git repository is used.
- The Azure DevOps project, Git repository, and Azure App Service must already be created.
About the Free Tier
Azure Pipelines offers a free tier, allowing you to set up an automated deployment environment at no cost. However, as of 1, an application is required to use the free tier.
Please refer to the following for more information on the free tier:
- Changes to Azure Pipelines free grants | Microsoft Learn
- Struggled with using Azure Pipelines' free tier (Japanese)
If you intend to use the paid tier from the start, applying for the free tier is not necessary. However, you must explicitly set up the paid tier by following these steps:
From the Azure DevOps top page > Organization Settings (not Project Settings) > Billing > Change "Paid parallel job" for MS Hosted CI/CD from 0 (Figure 1) to 1 and Save.
(Note that changing Self-Hosted CI/CD will have no effect.)
Figure 1. Azure DevOps Billing Settings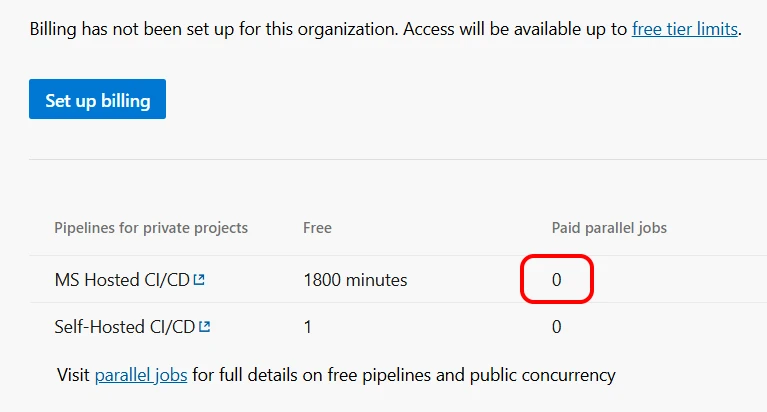
If you are setting up the paid tier for the first time, you will also need to configure your subscription via the "Set up billing" button.
I have been using the free tier continuously, so this button remains displayed.
The "1800 minutes" shown in the Free section means that 1800 minutes of pipeline (automated deployment) execution per month are available for free. If this limit is exceeded, pipelines will not run until the next month.
Steps
1Creating a Service Connection
First, you need to create a Service Connection.
A Service Connection is an authenticated connection setting that allows Azure DevOps pipelines to access external services. External services refer to resources such as GitHub repositories or Azure App Services. Since Azure is considered an external service from Azure DevOps' perspective, a connection setting is required.
flowchart LR
    A[Azure DevOps] -->|Service Connection| B(Azure App Service)
Click Project Settings > Service connections > New service connection in your project, then select Azure Resource Manager and click Next (Figure 2).
Figure 2. Selecting the Service Connection type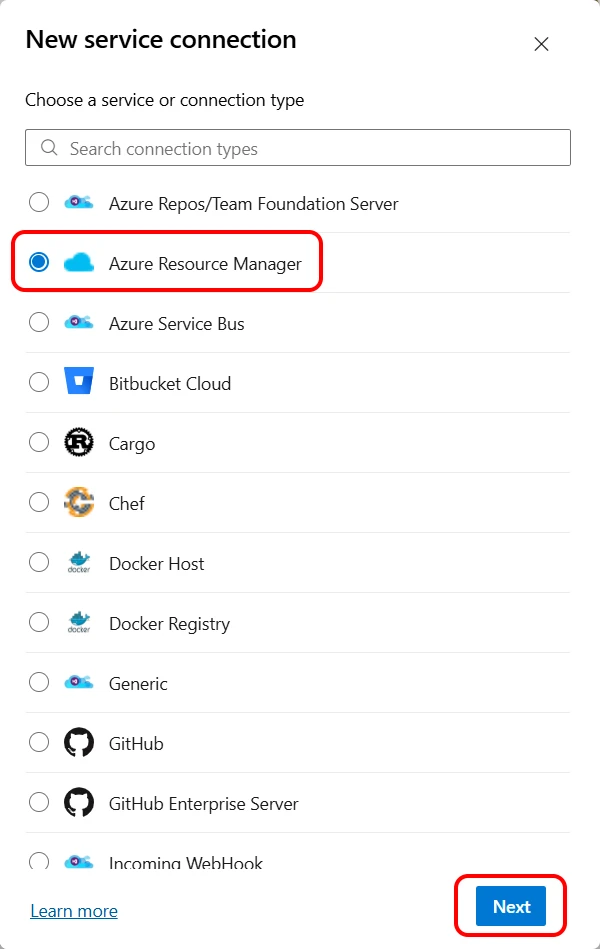
Configure the Service connection details (Figure 3).
Figure 3. Service Connection settings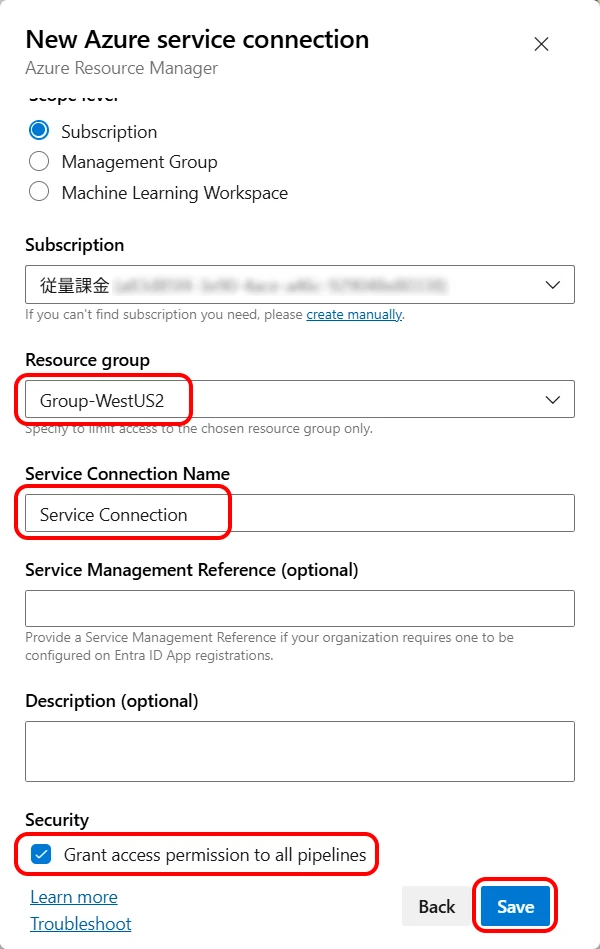
- Select Subscription
- Select Resource group
Select the resource group of the target App Service for deployment. - Enter Service Connection Name
A name to identify the Service Connection (here, "Service Connection"). - Check "Grant access permission to all pipelines"
This allows all pipelines to use this Service Connection.
If you want to control permissions on a per-pipeline basis, leave it unchecked.
Leave other settings at their default values and click the "Save" button.
*Items below Resource group can be changed later.
This completes the creation of the Service Connection.
2Creating an Azure Pipeline
Next, we will create the pipeline definition file (YAML file) that executes the deployment.
Navigate to Pipelines > Create Pipeline > Azure Repos Git (Figure 4) > Select your repository.
Figure 4. Selecting the repository type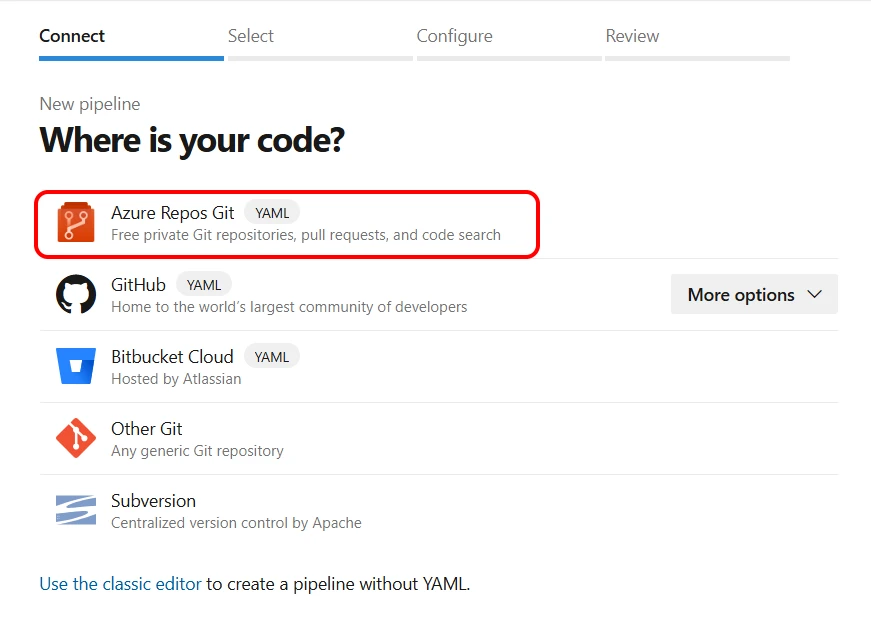
In "Configure your pipeline", select ASP.NET Core. (Figure 5)
It can be confusing, but make sure to select the one that says ASP.NET Core, not ASP.NET or ASP.NET Core (.NET Framework).
Figure 5. Configure your pipeline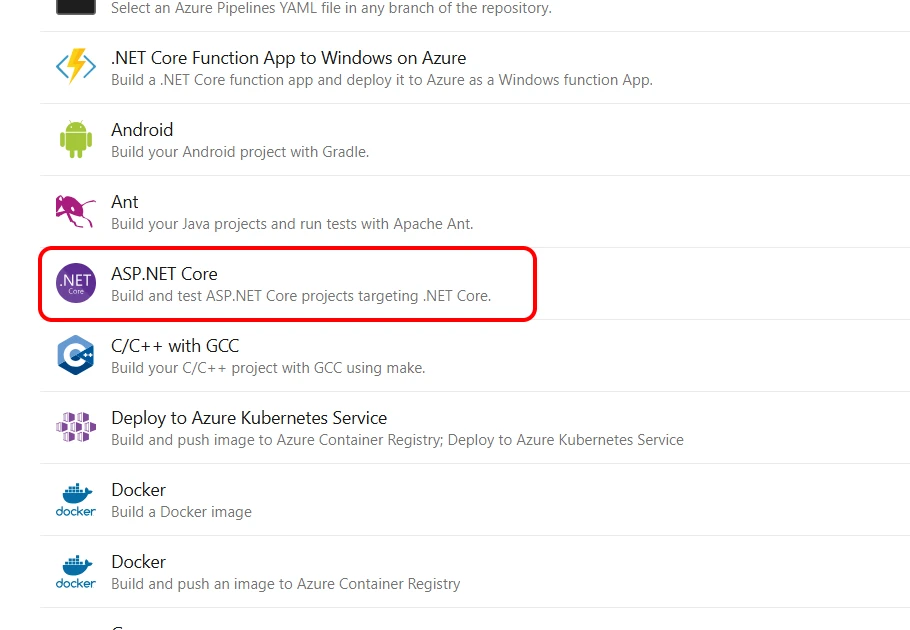
A template YAML file will be displayed (Figure 6).
Figure 6. Review your pipeline YAML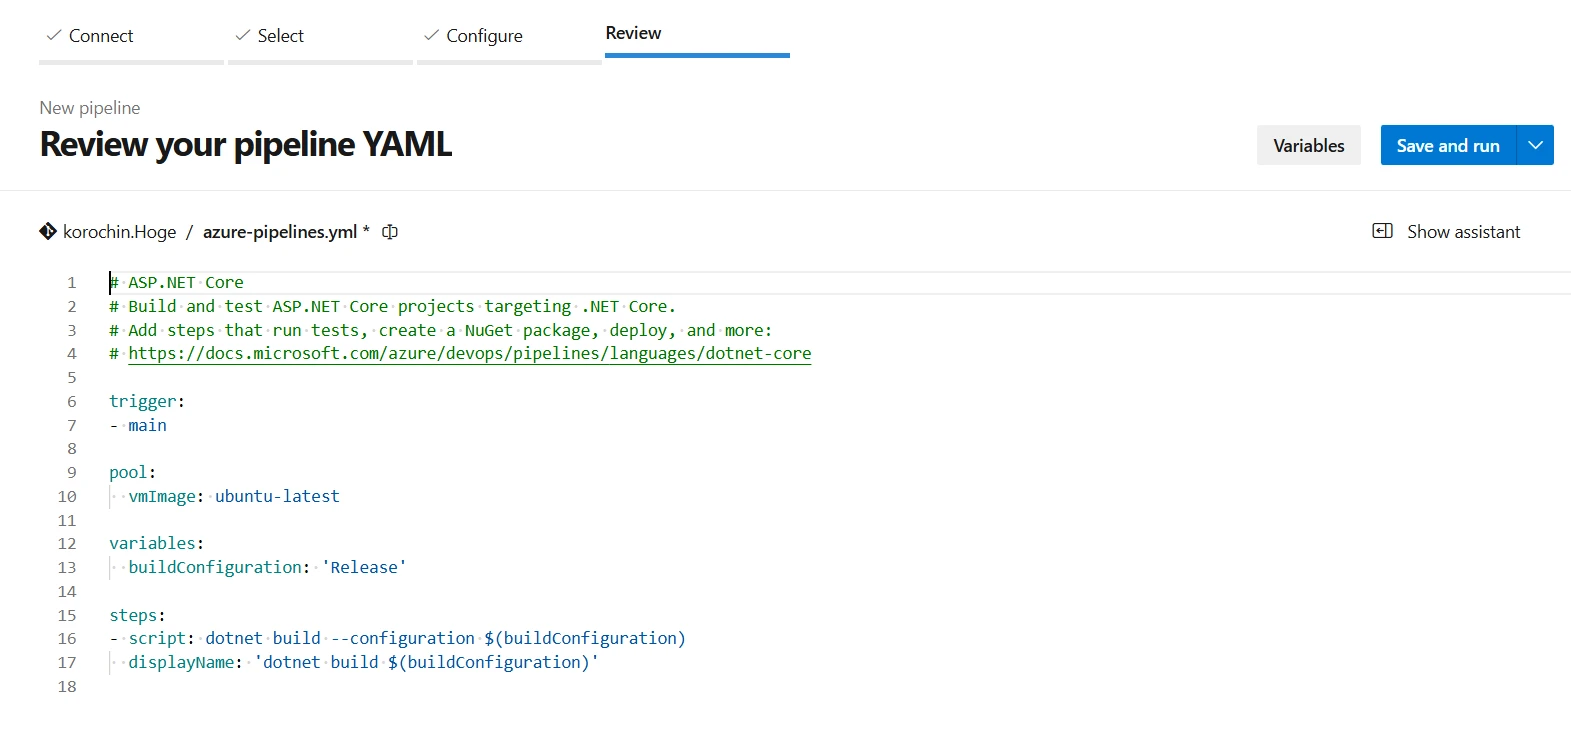
Without changing the content, click the "Save and run" button in the upper right.
A dialog for entering a commit message will appear (Figure 7).
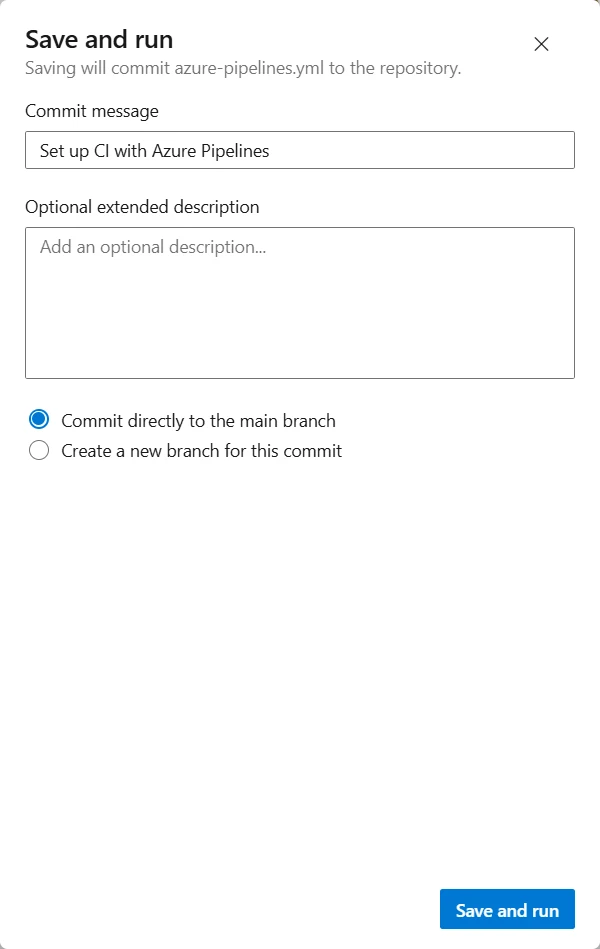
Clicking "Save and run" here will add a YAML file named azure-pipelines.yml to the root folder of the existing repository and push it to the repository.
Click "Save and run".
After a short while, a pipeline execution screen like the one below will appear (Figure 8).
The "Status" field at the bottom shows "Queued". This indicates that the pipeline execution request has been added to the queue but has not yet started.

Let's wait.
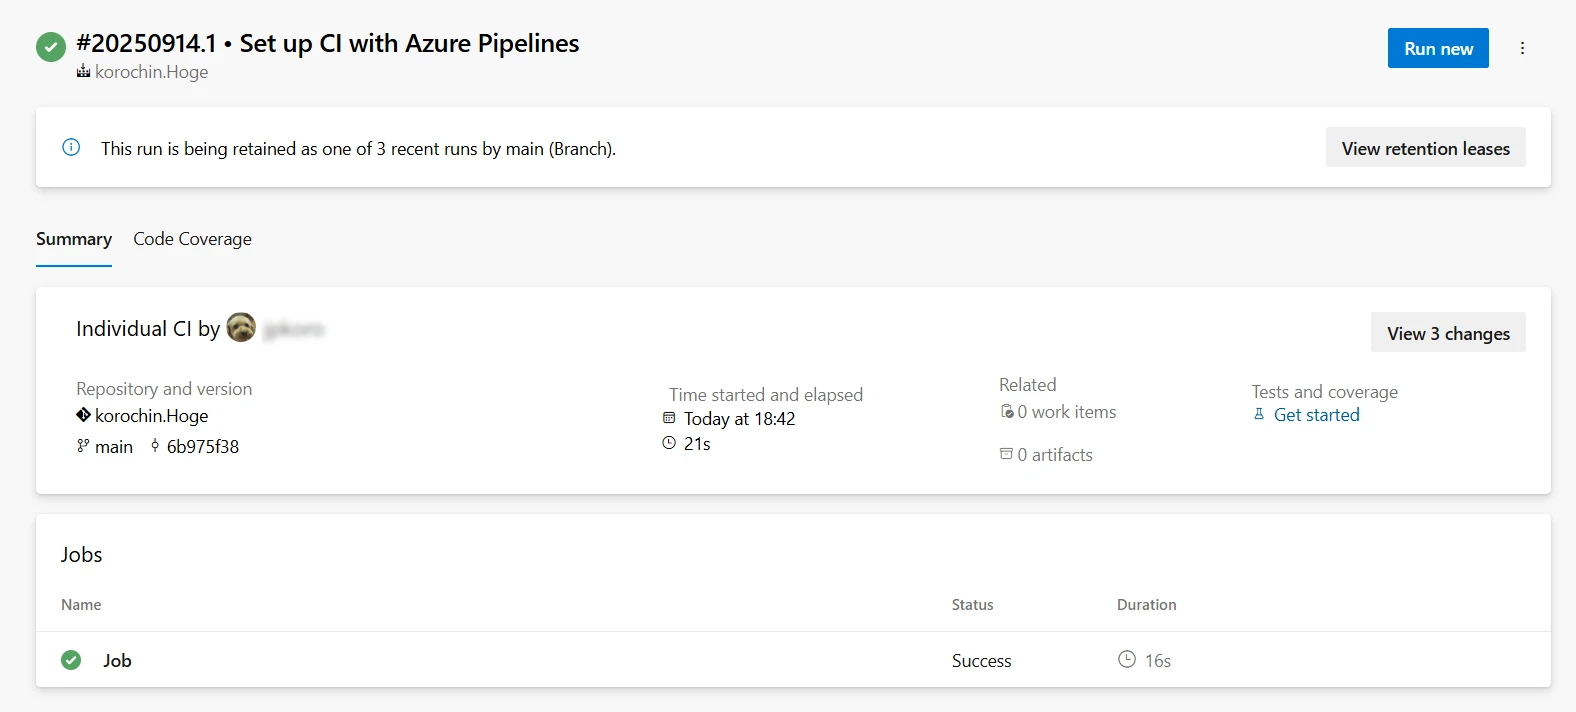
After a while, the Status will change to "Running" and finally to "Success".
A green checkmark will be displayed in the background.
This indicates that the pipeline execution has completed successfully (Figure 9).
3Contents of the YAML File
Has deployment been performed through the steps so far? No, it hasn't.
Only the build was executed. Let's take a closer look at the content of the template YAML file.
# ASP.NET Core
# Build and test ASP.NET Core projects targeting .NET Core.
# Add steps that run tests, create a NuGet package, deploy, and more:
# https://docs.microsoft.com/azure/devops/pipelines/languages/dotnet-core

trigger:
- main

pool:
  vmImage: ubuntu-latest

variables:
  buildConfiguration: 'Release'

steps:
- script: dotnet build --configuration $(buildConfiguration)
  displayName: 'dotnet build $(buildConfiguration)'
trigger section
trigger:
- main
This pipeline will automatically run when a push occurs to the main branch.
pool section
pool:
  vmImage: ubuntu-latest
Specifies the virtual machine image to run the pipeline.
ubuntu-latest refers to the latest Ubuntu environment.
Since this is a virtual machine for running the pipeline, it does not need to match the OS of the deployment target.
flowchart LR
    A(Azure Pipeline) -.-> B[Virtual Machine]
    B --> |Deploy| C(Execution Environment)
variables section
variables:
  buildConfiguration: 'Release'
The variables section allows you to define variables that can be referenced within the pipeline.
The variable here is:
- Variable name:
$(buildConfiguration) - Value:
Release
steps section
steps:
- script: dotnet build --configuration $(buildConfiguration)
  displayName: 'dotnet build $(buildConfiguration)'
The steps section describes the commands (script) or tasks (task) (steps) to be executed in the pipeline.
- The
dotnet buildcommand builds the project.
The--configurationoption specifies Release mode. displayNameis the label displayed in the Azure DevOps UI.
Since the value of$(buildConfiguration)isRelease, it will display asdotnet build Release.
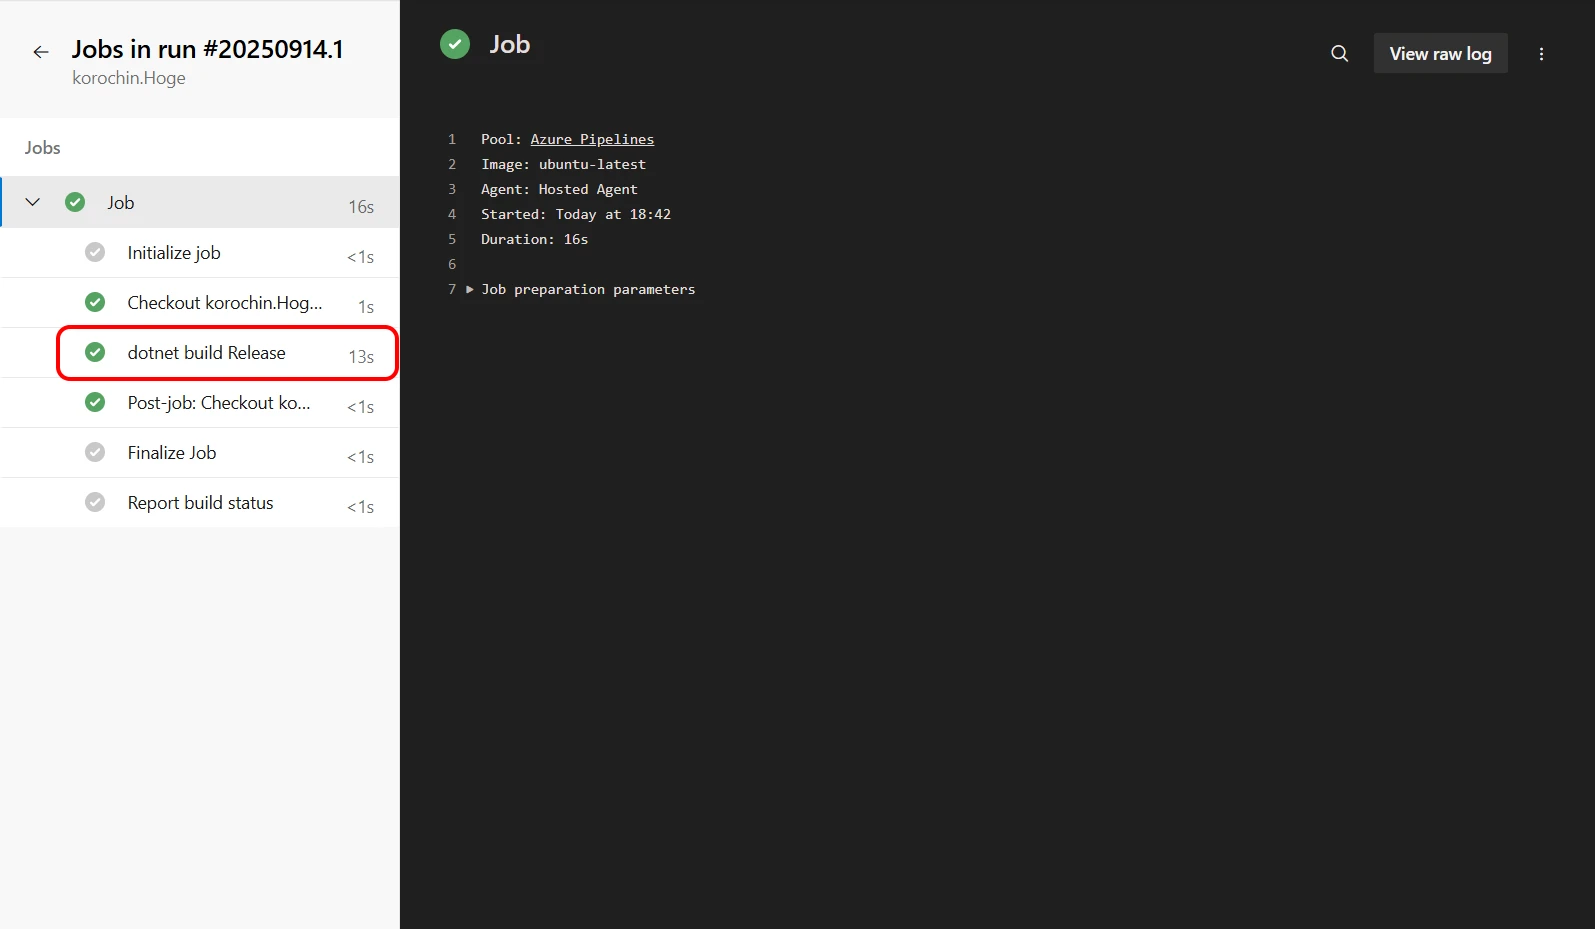
Where is this label displayed?
Clicking the Job row in Figure 8 and Figure 9 navigates to the detailed screen of the pipeline execution.
The execution details of each process within the pipeline are displayed here, and displayName is shown here (Figure 10).
4Adding a Publish Task
As seen so far, the current YAML file only defines settings up to the build.
Let's add the deployment settings.
To perform a deployment, you need to collect and package the files as artifacts for deployment.
This is known as "publishing".
Here, the artifacts are compressed into a single zip file.
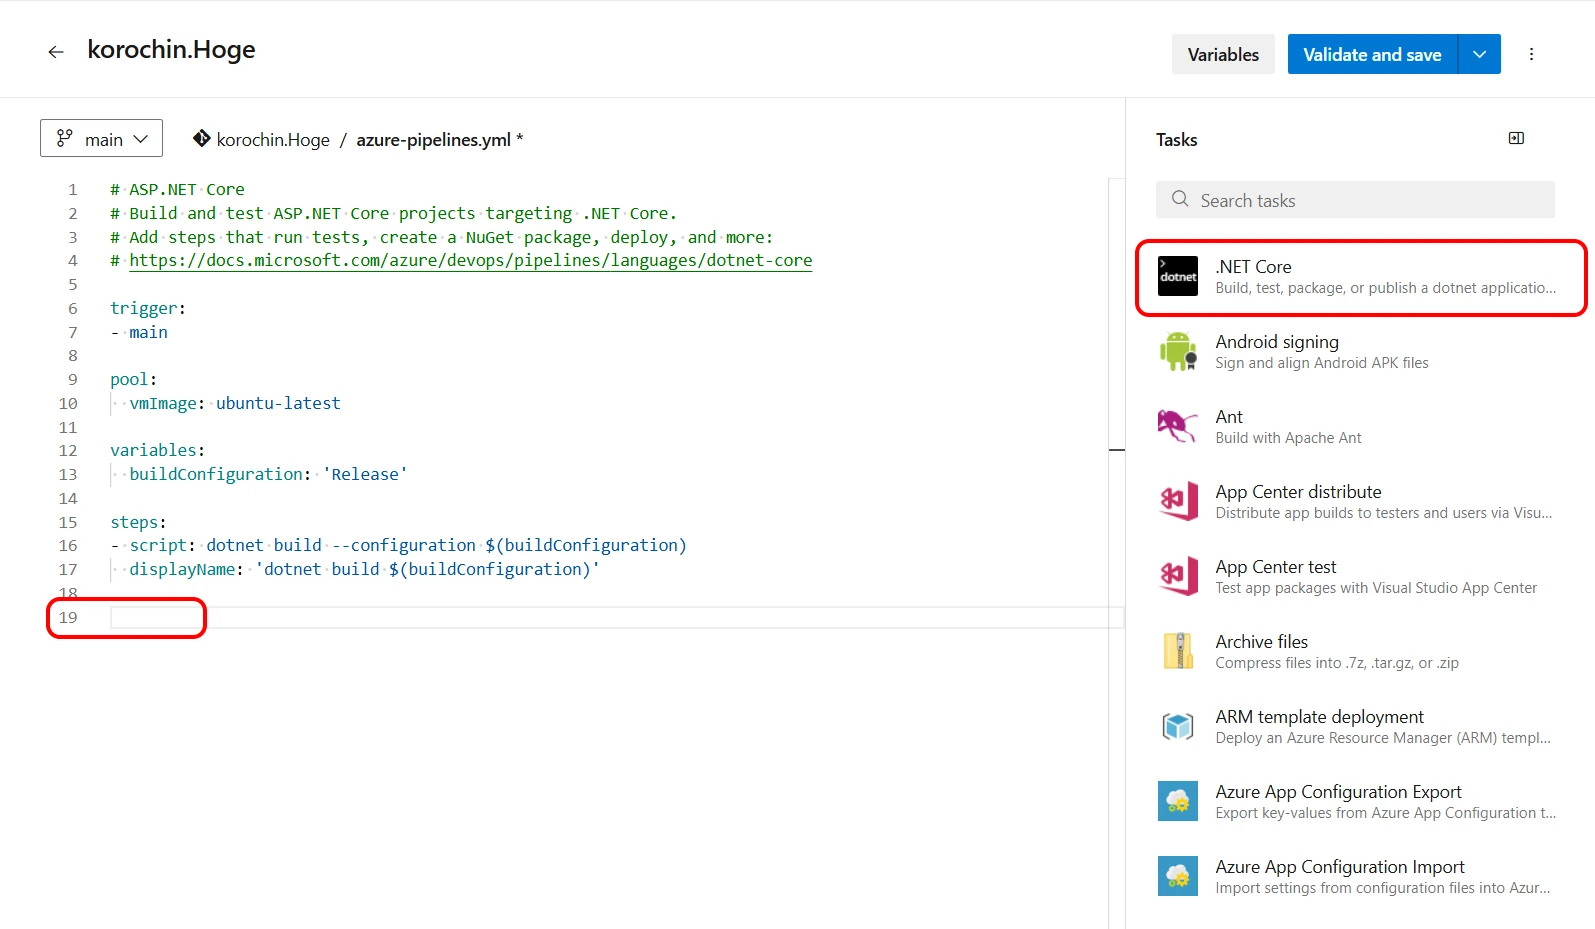
You can add a publish task from the Azure Pipeline GUI.
Select the three dots in the upper right corner of Figure 8, Figure 9 > Edit pipeline.
To add code to the end of the YAML file, place the cursor on the last line and then select .NET Core under Tasks (Figure 11).
(If Tasks is not displayed, click Show assistant in the upper right.)
Enter the following (Figure 12).
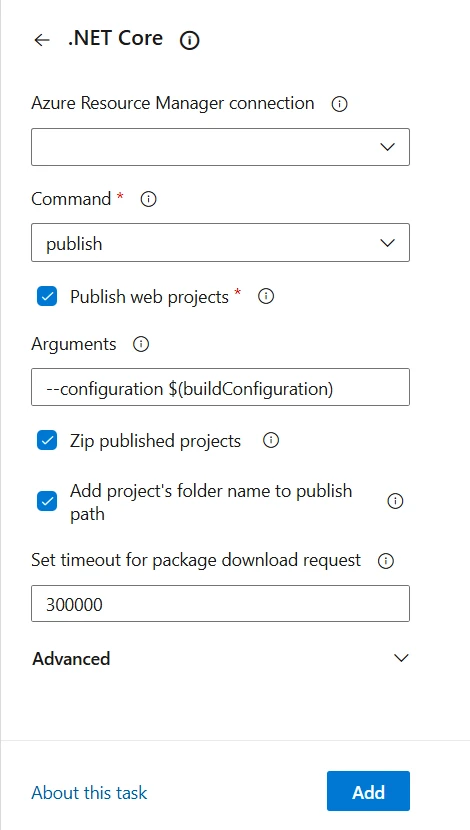
- Command:
publish - Arguments:
--configuration $(buildConfiguration)
This will build inReleasemode.
Leave all other settings as default and click the "Add" button.
The publish task code will be added as shown below (Figure 13).
Figure 13. Publish task code added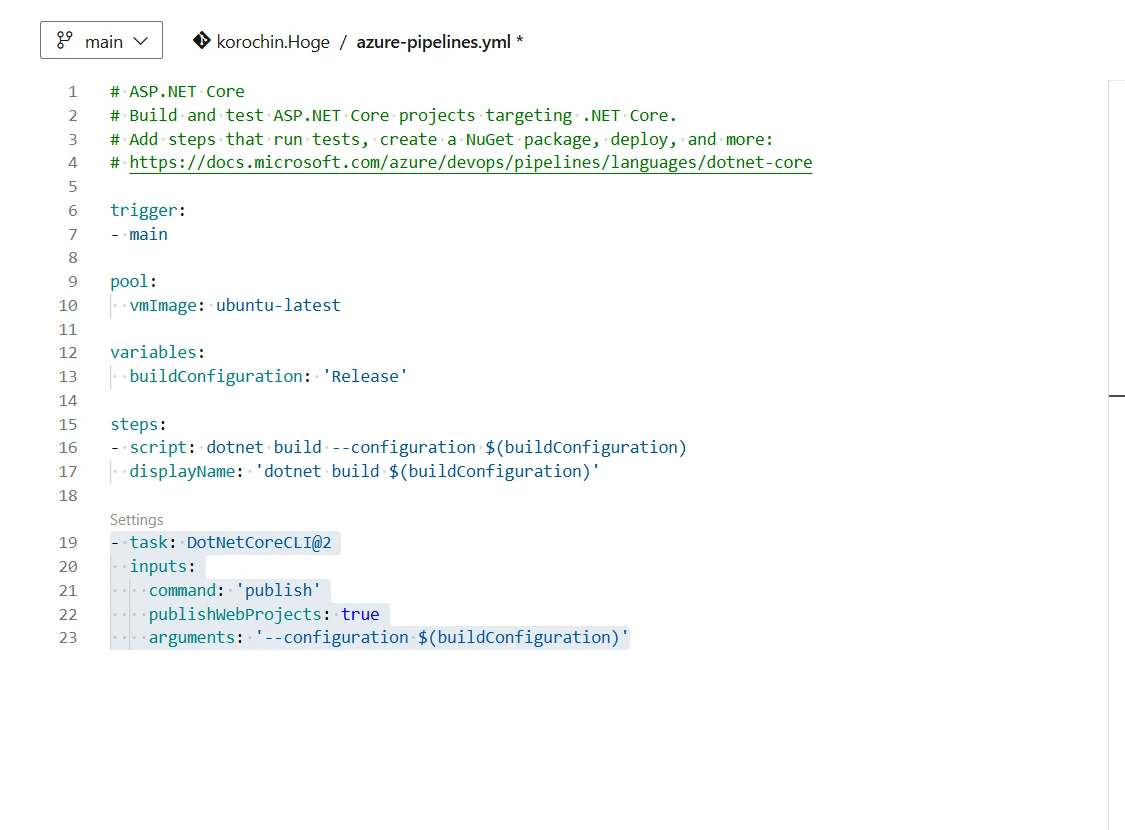
This completes the addition of the publish task.
5Adding a Deploy Task
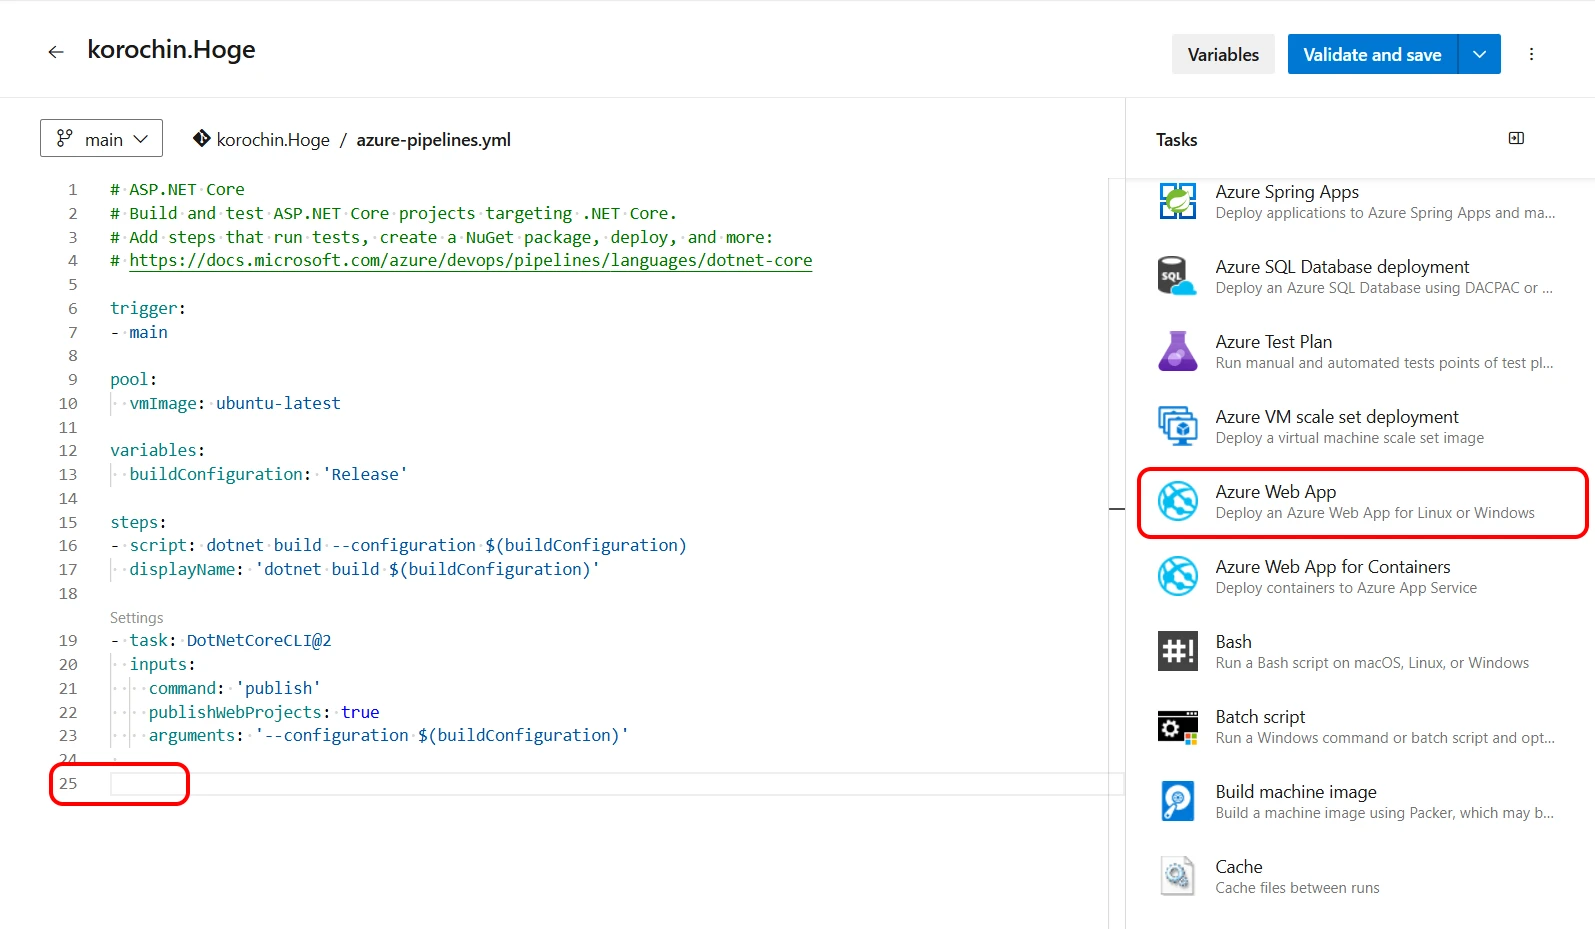
Following the same process as in (4), place the cursor on the last line of the YAML and then select Azure Web App under Tasks (Figure 14).
Select the details of the deployment target (Figure 15).
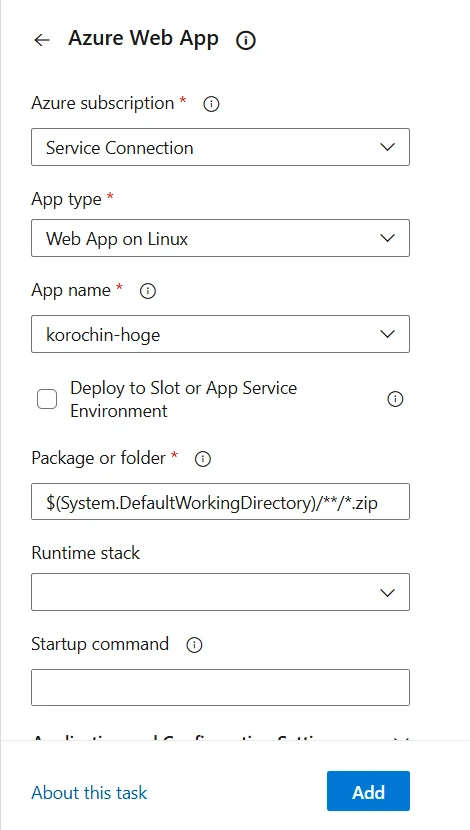
- Azure subscription
Select the Service Connection created in (1). - App type
Select the type of deployment target (Windows/Linux). - App name
Select the target App Service for deployment.
Leave other settings at their default values and click the "Add" button.
The task code to execute the deployment will be added as shown below (Figure 16).
Figure 16. Deploy task code added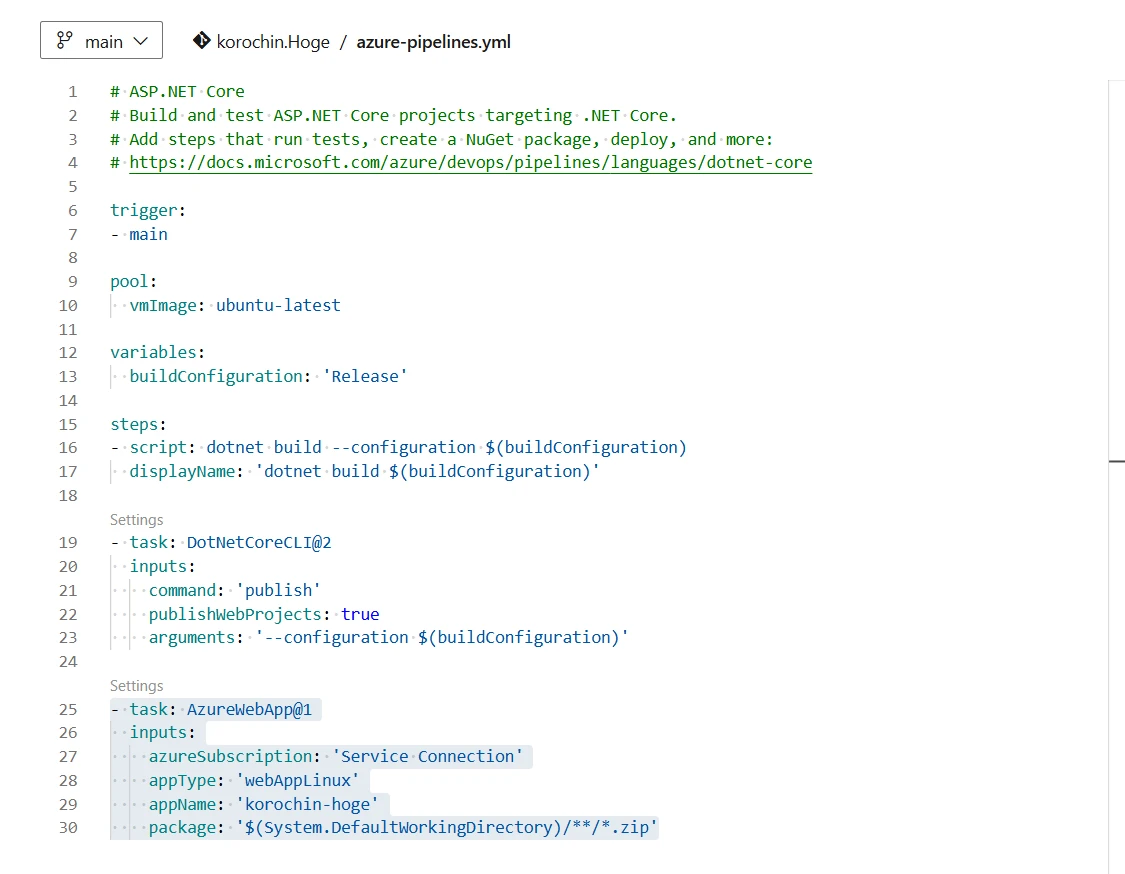
6Executing the Deployment
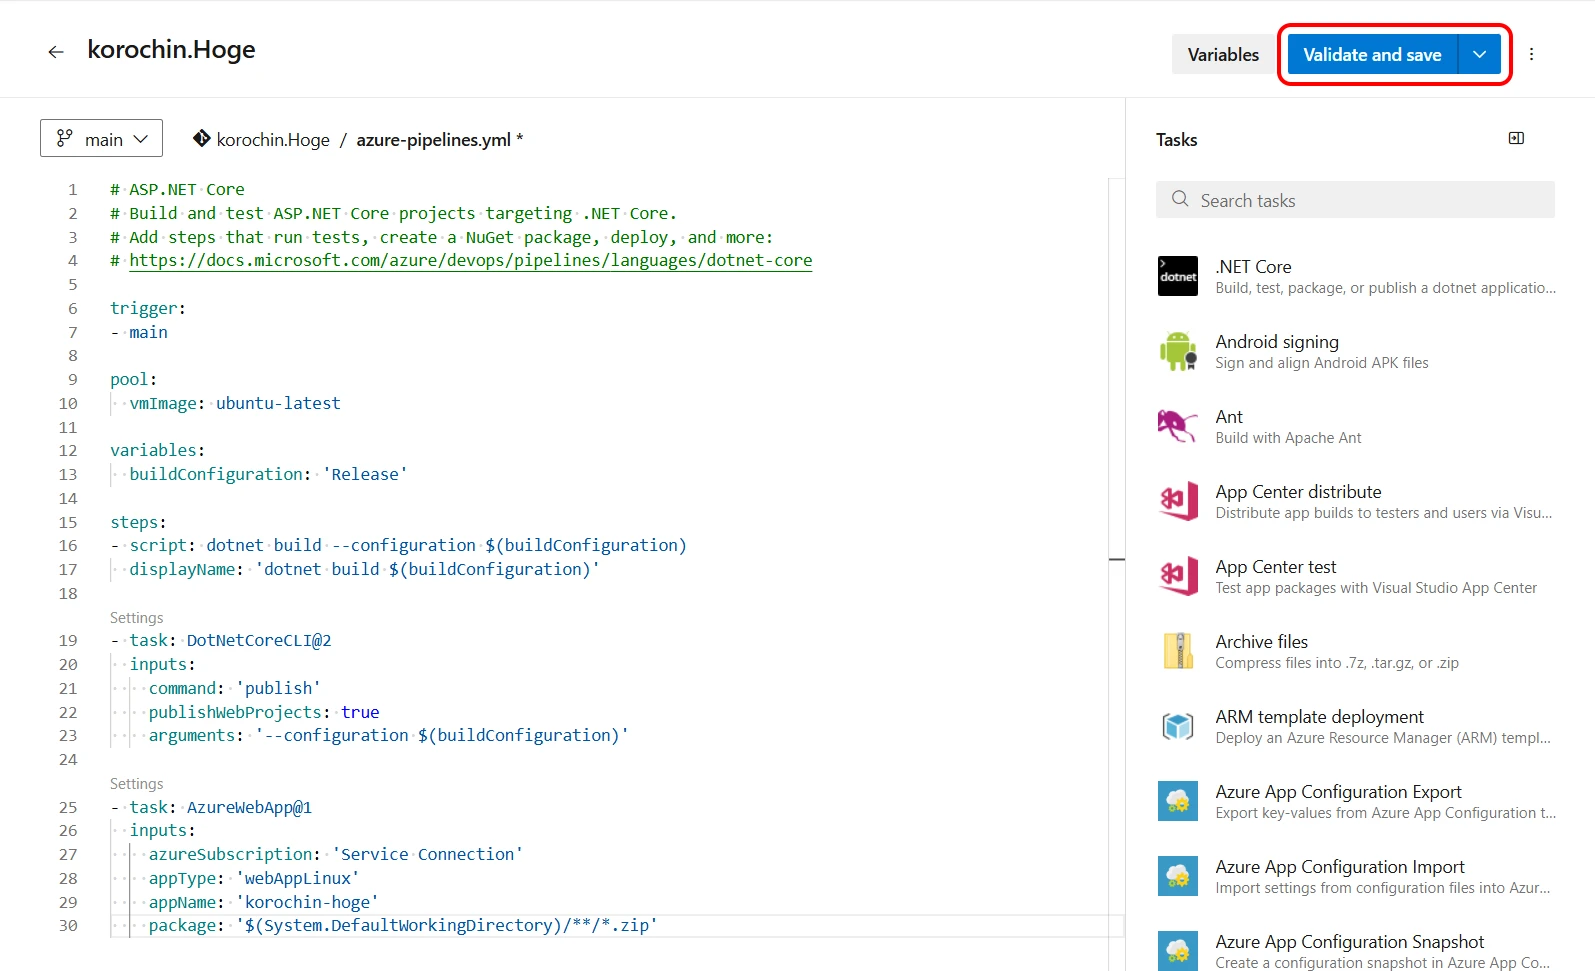
All necessary settings for deployment have been completed up to this point.
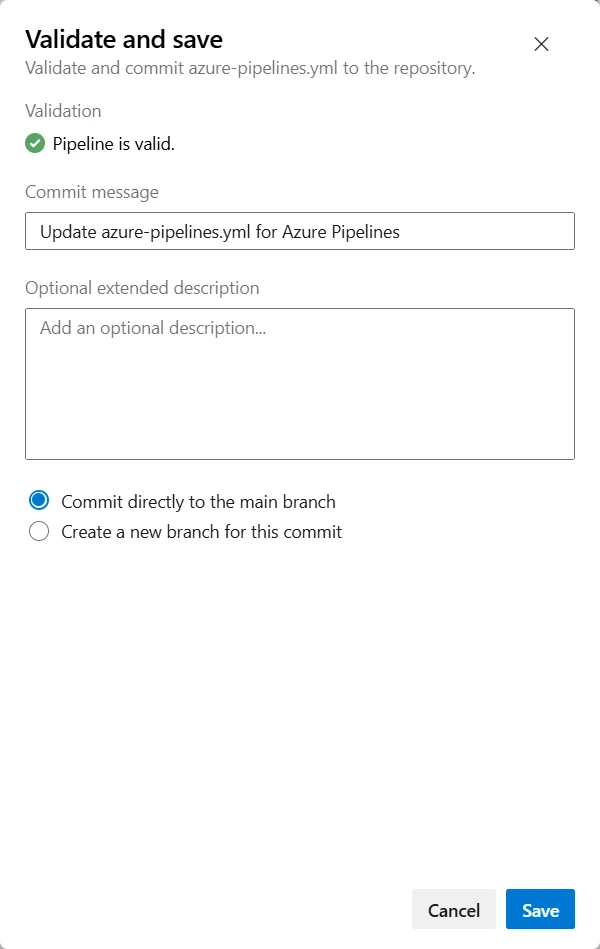
Click the "Validate and save" button (Figure 17).
Click the "Save" button (Figure 18).
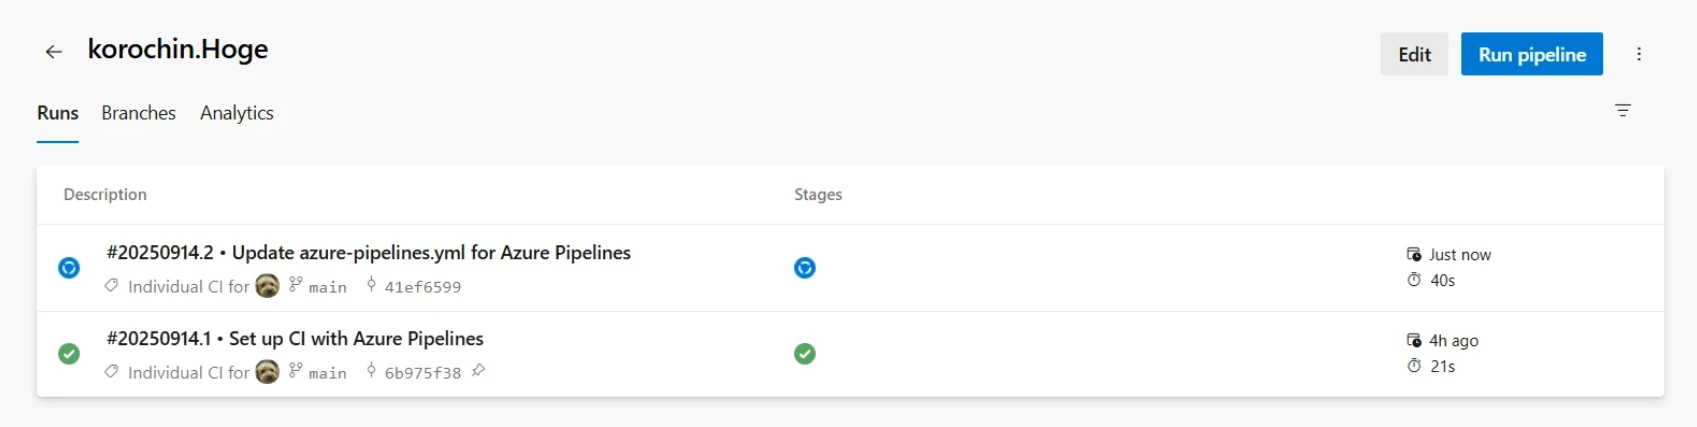
The screen will automatically transition to the pipeline execution view (Figure 19).
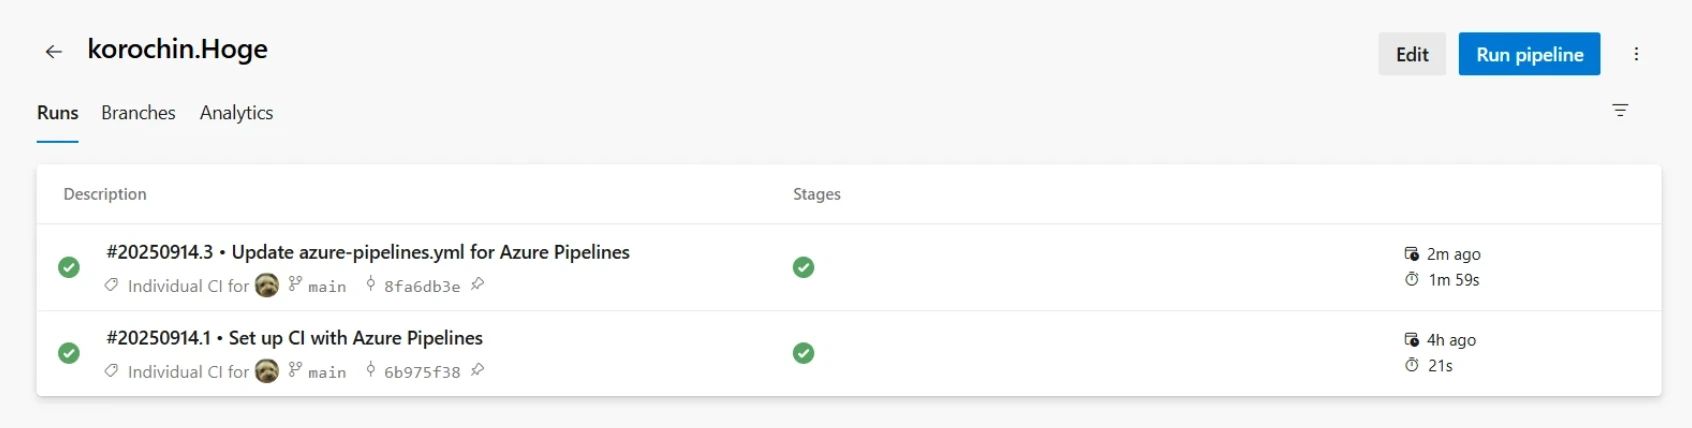
After a short wait, the pipeline execution will complete (Figure 20).
This completes the deployment.
Notes and Remarks
This completes the setup for pushing to a repository (Git) -> automated deployment to the execution environment.
From now on, pushing source code to the repository will automatically trigger deployment.
Let's review the YAML file content again.
Making the YAML File More Compact
# ASP.NET Core
# Build and test ASP.NET Core projects targeting .NET Core.
# Add steps that run tests, create a NuGet package, deploy, and more:
# https://docs.microsoft.com/azure/devops/pipelines/languages/dotnet-core

trigger:
- main

pool:
  vmImage: ubuntu-latest

variables:
  buildConfiguration: 'Release'

steps:
- script: dotnet build --configuration $(buildConfiguration)
  displayName: 'dotnet build $(buildConfiguration)'

- task: DotNetCoreCLI@2
  inputs:
    command: 'publish'
    publishWebProjects: true
    arguments: '--configuration $(buildConfiguration)'

- task: AzureWebApp@1
  inputs:
    azureSubscription: 'Service Connection'
    appType: 'webAppLinux'
    appName: 'korochin-hoge'
    package: '$(System.DefaultWorkingDirectory)/**/*.zip'
From top to bottom, the meaning is as follows:
- trigger:
mainbranch is the trigger - pool: Uses the latest Ubuntu image for pipeline execution
- variables: Variable definitions
- steps: Step (process) definitions
- Build (
dotnet build) - Publish (
publish) - Deploy (
deploy)
- Build (
In fact, the publish task includes the build (dotnet build) process.
Therefore, the - script: dotnet build process is actually unnecessary.
Also, if a Debug mode build is sufficient, the --configuration specification is not required. 2
Let's also remove the comments.
trigger:
- main

pool:
  vmImage: ubuntu-latest

steps:
- task: DotNetCoreCLI@2
  inputs:
    command: 'publish'
    publishWebProjects: true

- task: AzureWebApp@1
  inputs:
    azureSubscription: 'Service Connection'
    appType: 'webAppLinux'
    appName: 'korochin-hoge'
    package: '$(System.DefaultWorkingDirectory)/**/*.zip'
This is the minimum required code to achieve automated deployment.
If you want to deploy in Release mode, you can add the line arguments: '--configuration Release' without using a variable.
Difference between script and task
- script directly executes commands like Bash or PowerShell on the virtual machine running the Pipeline.
- script: dotnet build means that the virtual machine has .NET SDK pre-installed, and dotnet build is executed, resulting in the project being built.
- task uses built-in features defined in Azure Pipelines. Various tasks are available for testing, building, deployment, and more. You can check the list of tasks at Azure Pipelines tasks reference | Microsoft Learn.